
Skin booster treatments have become increasingly popular for their ability to enhance skin hydration, texture, and overall radiance. These treatments involve injecting hyaluronic acid-based products into the skin to provide deep hydration and stimulate collagen production. If you’re considering a skin booster treatment, here’s a comprehensive step-by-step guide to help you understand the process and what to expect.
Step 1: Consultation
The first step in any skin booster treatment is a thorough consultation with a qualified dermatologist or aesthetic practitioner. During this consultation, your practitioner will assess your skin type, concerns, and goals. They will explain the procedure, discuss the expected results, and address any questions or concerns you may have. This is also the time to disclose any medical history or allergies to ensure the treatment is safe for you.
Step 2: Preparation
Once you decide to proceed with the treatment, the next step is preparation. Your practitioner will clean the treatment area to remove any makeup, oils, or impurities. This ensures a sterile environment and reduces the risk of infection. In some cases, a topical numbing cream may be applied to minimize discomfort during the injection process. This cream usually takes about 20-30 minutes to take effect.
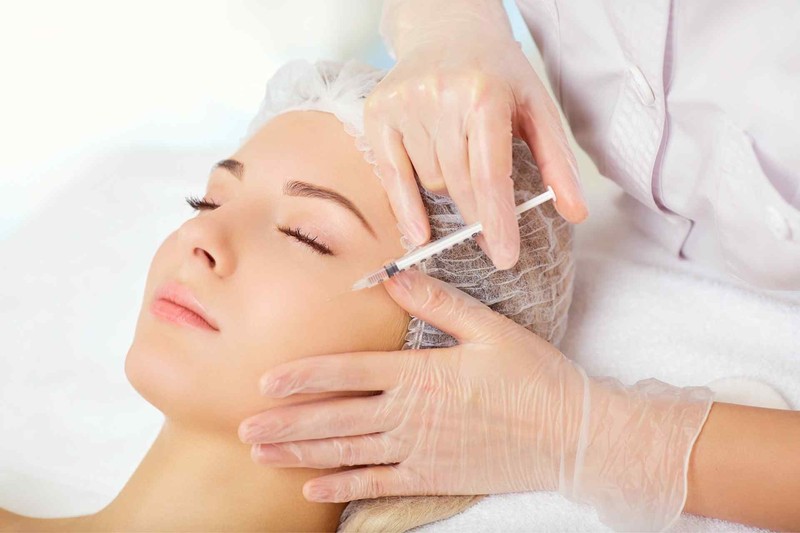
Step 3: The Injection Process
The actual skin booster treatment involves a series of small injections into the middle layer of the skin, known as the dermis. The practitioner uses a fine needle or a micro-cannula to inject the hyaluronic acid-based product evenly across the treatment area. The injections are typically quick and may cause minimal discomfort. The entire injection process usually takes around 30 minutes, depending on the size of the treatment area.
Step 4: Post-Treatment Care
After the injections are complete, your practitioner will provide you with post-treatment care instructions. These may include:
- Avoiding excessive sun exposure: Protect your skin from the sun by wearing sunscreen with at least SPF 30.
- Refraining from touching or rubbing the treated area: This helps prevent irritation and infection.
- Avoiding strenuous exercise and excessive sweating: This reduces the risk of infection and helps the product settle into the skin.
- Hydrating your skin: Drink plenty of water and use a gentle, hydrating moisturizer to maintain skin hydration.
Step 5: Recovery and Results
One of the advantages of skin booster treatments is the minimal downtime. Most people can resume their daily activities immediately after the treatment. You may experience mild redness, swelling, or bruising at the injection sites, but these side effects typically subside within a few days.
The results of a skin booster treatment are not immediate. The hyaluronic acid needs time to integrate into the skin and stimulate collagen production. You may start to notice an improvement in skin hydration and texture within a week, with full results appearing after a few weeks. The skin will look plumper, smoother, and more radiant.
Step 6: Follow-Up Treatments
For optimal results, skin booster treatments are often recommended in a series of sessions. Your practitioner will create a personalized treatment plan based on your skin’s needs and goals. Typically, a series of 2-3 treatments spaced 2-4 weeks apart is recommended. Maintenance sessions every 6-12 months can help sustain the benefits.
Conclusion
Skin booster treatments are an excellent option for anyone looking to improve their skin’s hydration, texture, and overall appearance. By understanding the step-by-step process, from consultation to follow-up treatments, you can approach your skin booster treatment with confidence. Always choose a qualified practitioner to ensure the best results and minimize the risk of complications. With the right care and maintenance, you can enjoy a smoother, more radiant complexion that lasts.